
'%3e%3cpath%20fill-rule='evenodd'%20clip-rule='evenodd'%20d='M6.99935%2012.8327C10.221%2012.8327%2012.8327%2010.221%2012.8327%206.99935C12.8327%203.77769%2010.221%201.16602%206.99935%201.16602C3.77769%201.16602%201.16602%203.77769%201.16602%206.99935C1.16602%2010.221%203.77769%2012.8327%206.99935%2012.8327Z'%20stroke='%23666666'%20stroke-linecap='round'%20stroke-linejoin='round'/%3e%3cpath%20d='M1.16602%207H12.8327'%20stroke='%23666666'%20stroke-linecap='round'%20stroke-linejoin='round'/%3e%3cpath%20fill-rule='evenodd'%20clip-rule='evenodd'%20d='M6.99935%2012.8327C8.28802%2012.8327%209.33268%2010.221%209.33268%206.99935C9.33268%203.77769%208.28802%201.16602%206.99935%201.16602C5.71068%201.16602%204.66602%203.77769%204.66602%206.99935C4.66602%2010.221%205.71068%2012.8327%206.99935%2012.8327Z'%20stroke='%23666666'%20stroke-linecap='round'%20stroke-linejoin='round'/%3e%3cpath%20d='M2.875%202.95898C3.93063%204.01461%205.38896%204.66754%206.99978%204.66754C8.61062%204.66754%2010.069%204.01461%2011.1246%202.95898'%20stroke='%23666666'%20stroke-linecap='round'%20stroke-linejoin='round'/%3e%3cpath%20d='M11.1246%2011.0425C10.069%209.98691%208.61062%209.33398%206.99978%209.33398C5.38896%209.33398%203.93063%209.98691%202.875%2011.0425'%20stroke='%23666666'%20stroke-linecap='round'%20stroke-linejoin='round'/%3e%3c/g%3e%3cdefs%3e%3cclipPath%20id='clip0_1267_9109'%3e%3crect%20width='14'%20height='14'%20fill='white'/%3e%3c/clipPath%3e%3c/defs%3e%3c/svg%3e)


 Service Center
Vinotek
Before using the features in this user manual, you must first understand the scope of Vinotek digital signing:
-
Vinotek is applicable for scenarios where individual signers use Indonesia’s local digital signing capabilities to complete signing.
-
Currently, it only supports [Indonesian individuals].
-
Before using Vinotek, the signer must have a Vinotek account that has been fully activated with real-name verification.
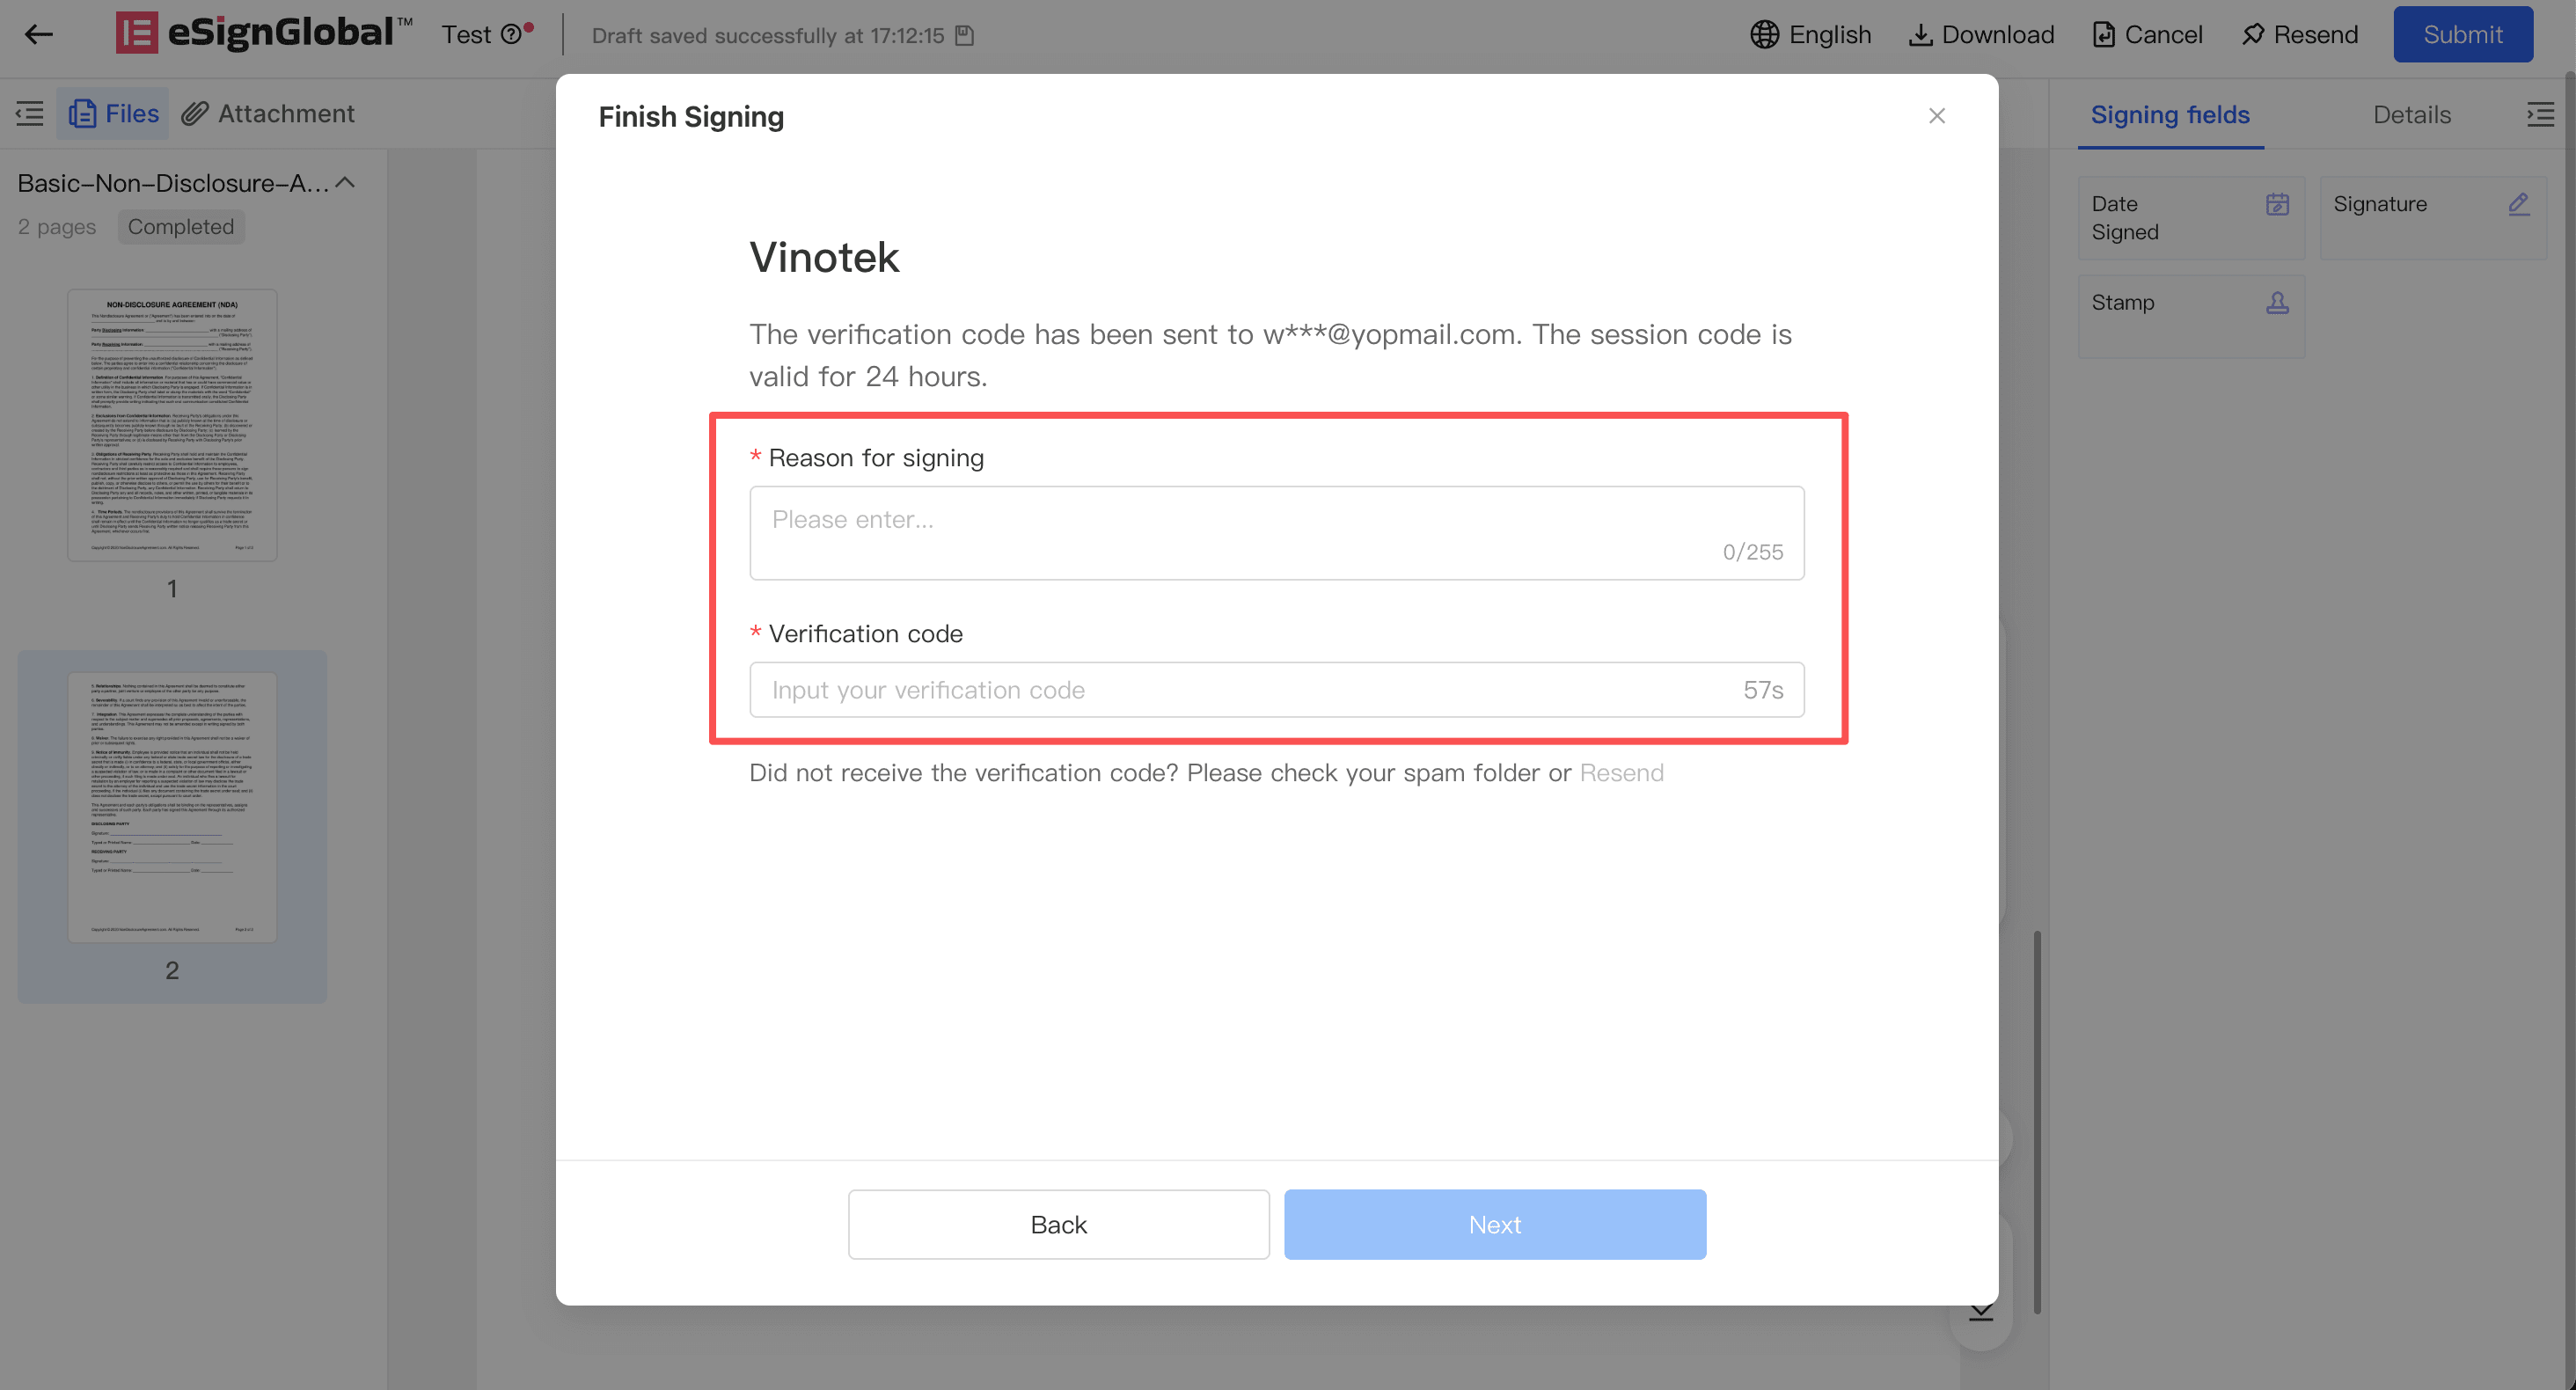
When using eSign.AI Vinotek digital signing, after placing the signature, the signer can receive a verification code via the email address registered with Vinotek and fill in the reason for signing to complete the process. If you do not yet have a Vinotek account, you can initiate registration directly from the signing popup window and continue signing after completing real-name activation according to the email instructions.
Selecting Vinotek
-
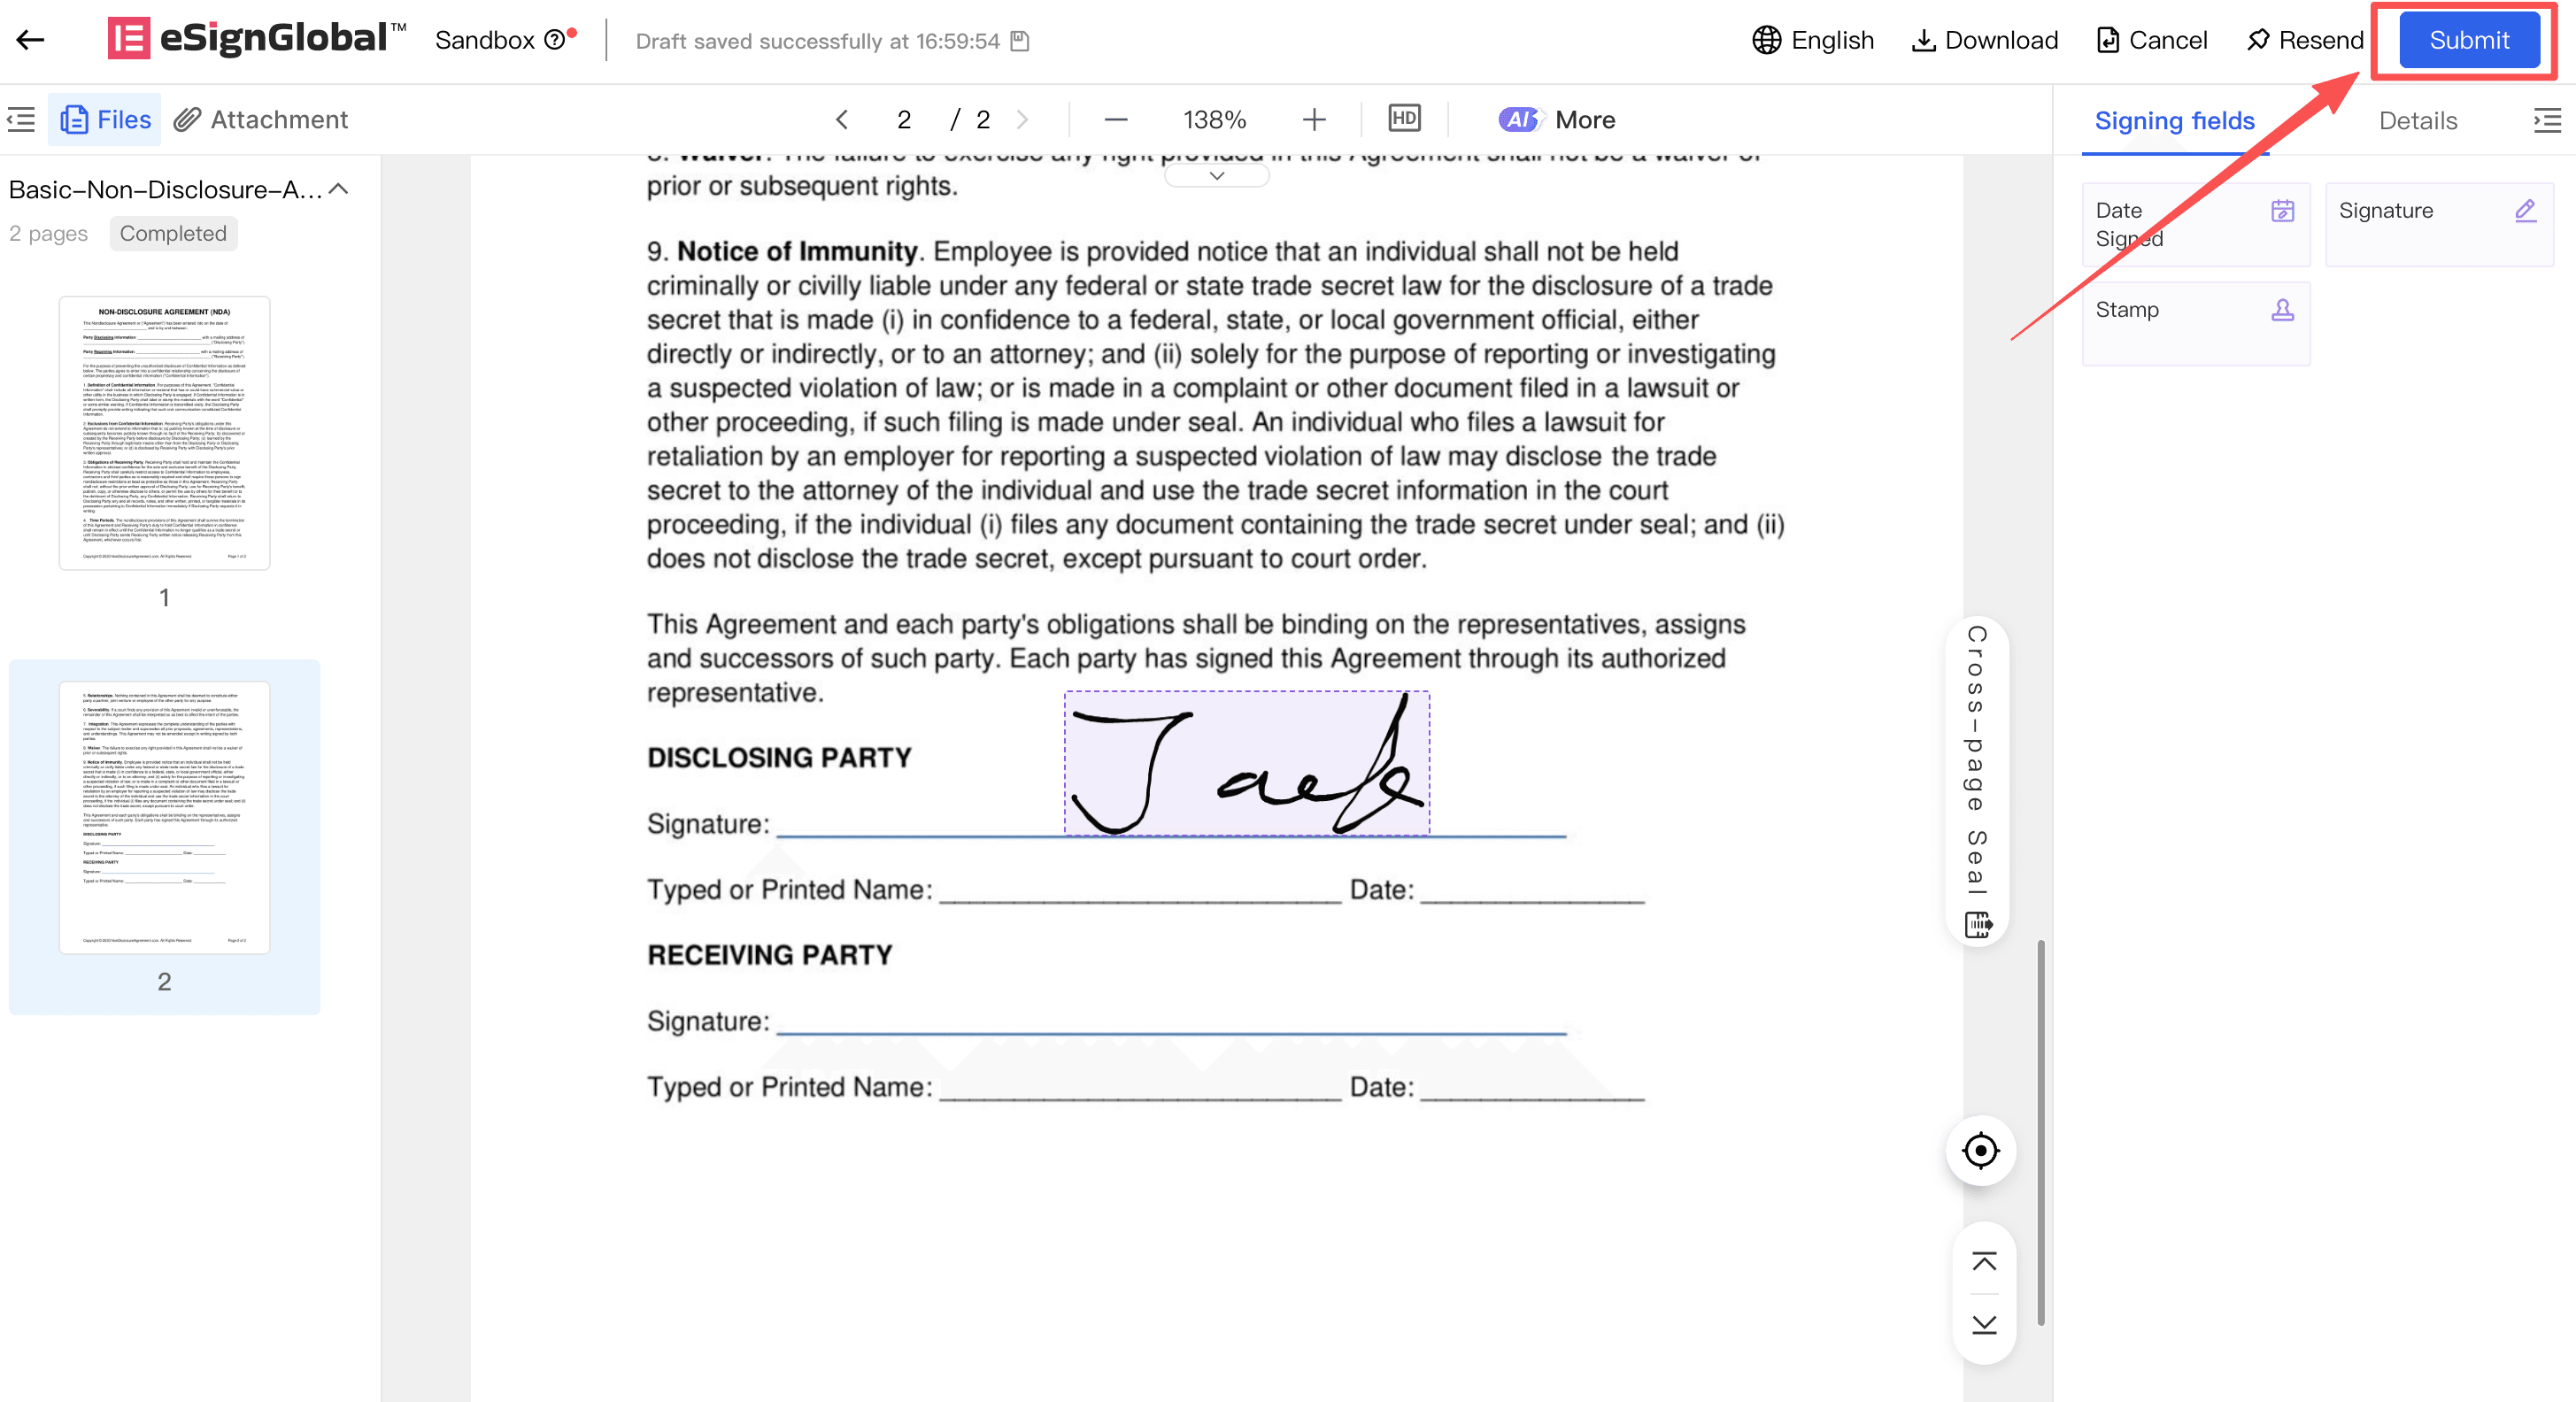
The signer opens the document to be signed and places or confirms the signature as prompted on the page.
-
Click [Submit].
-
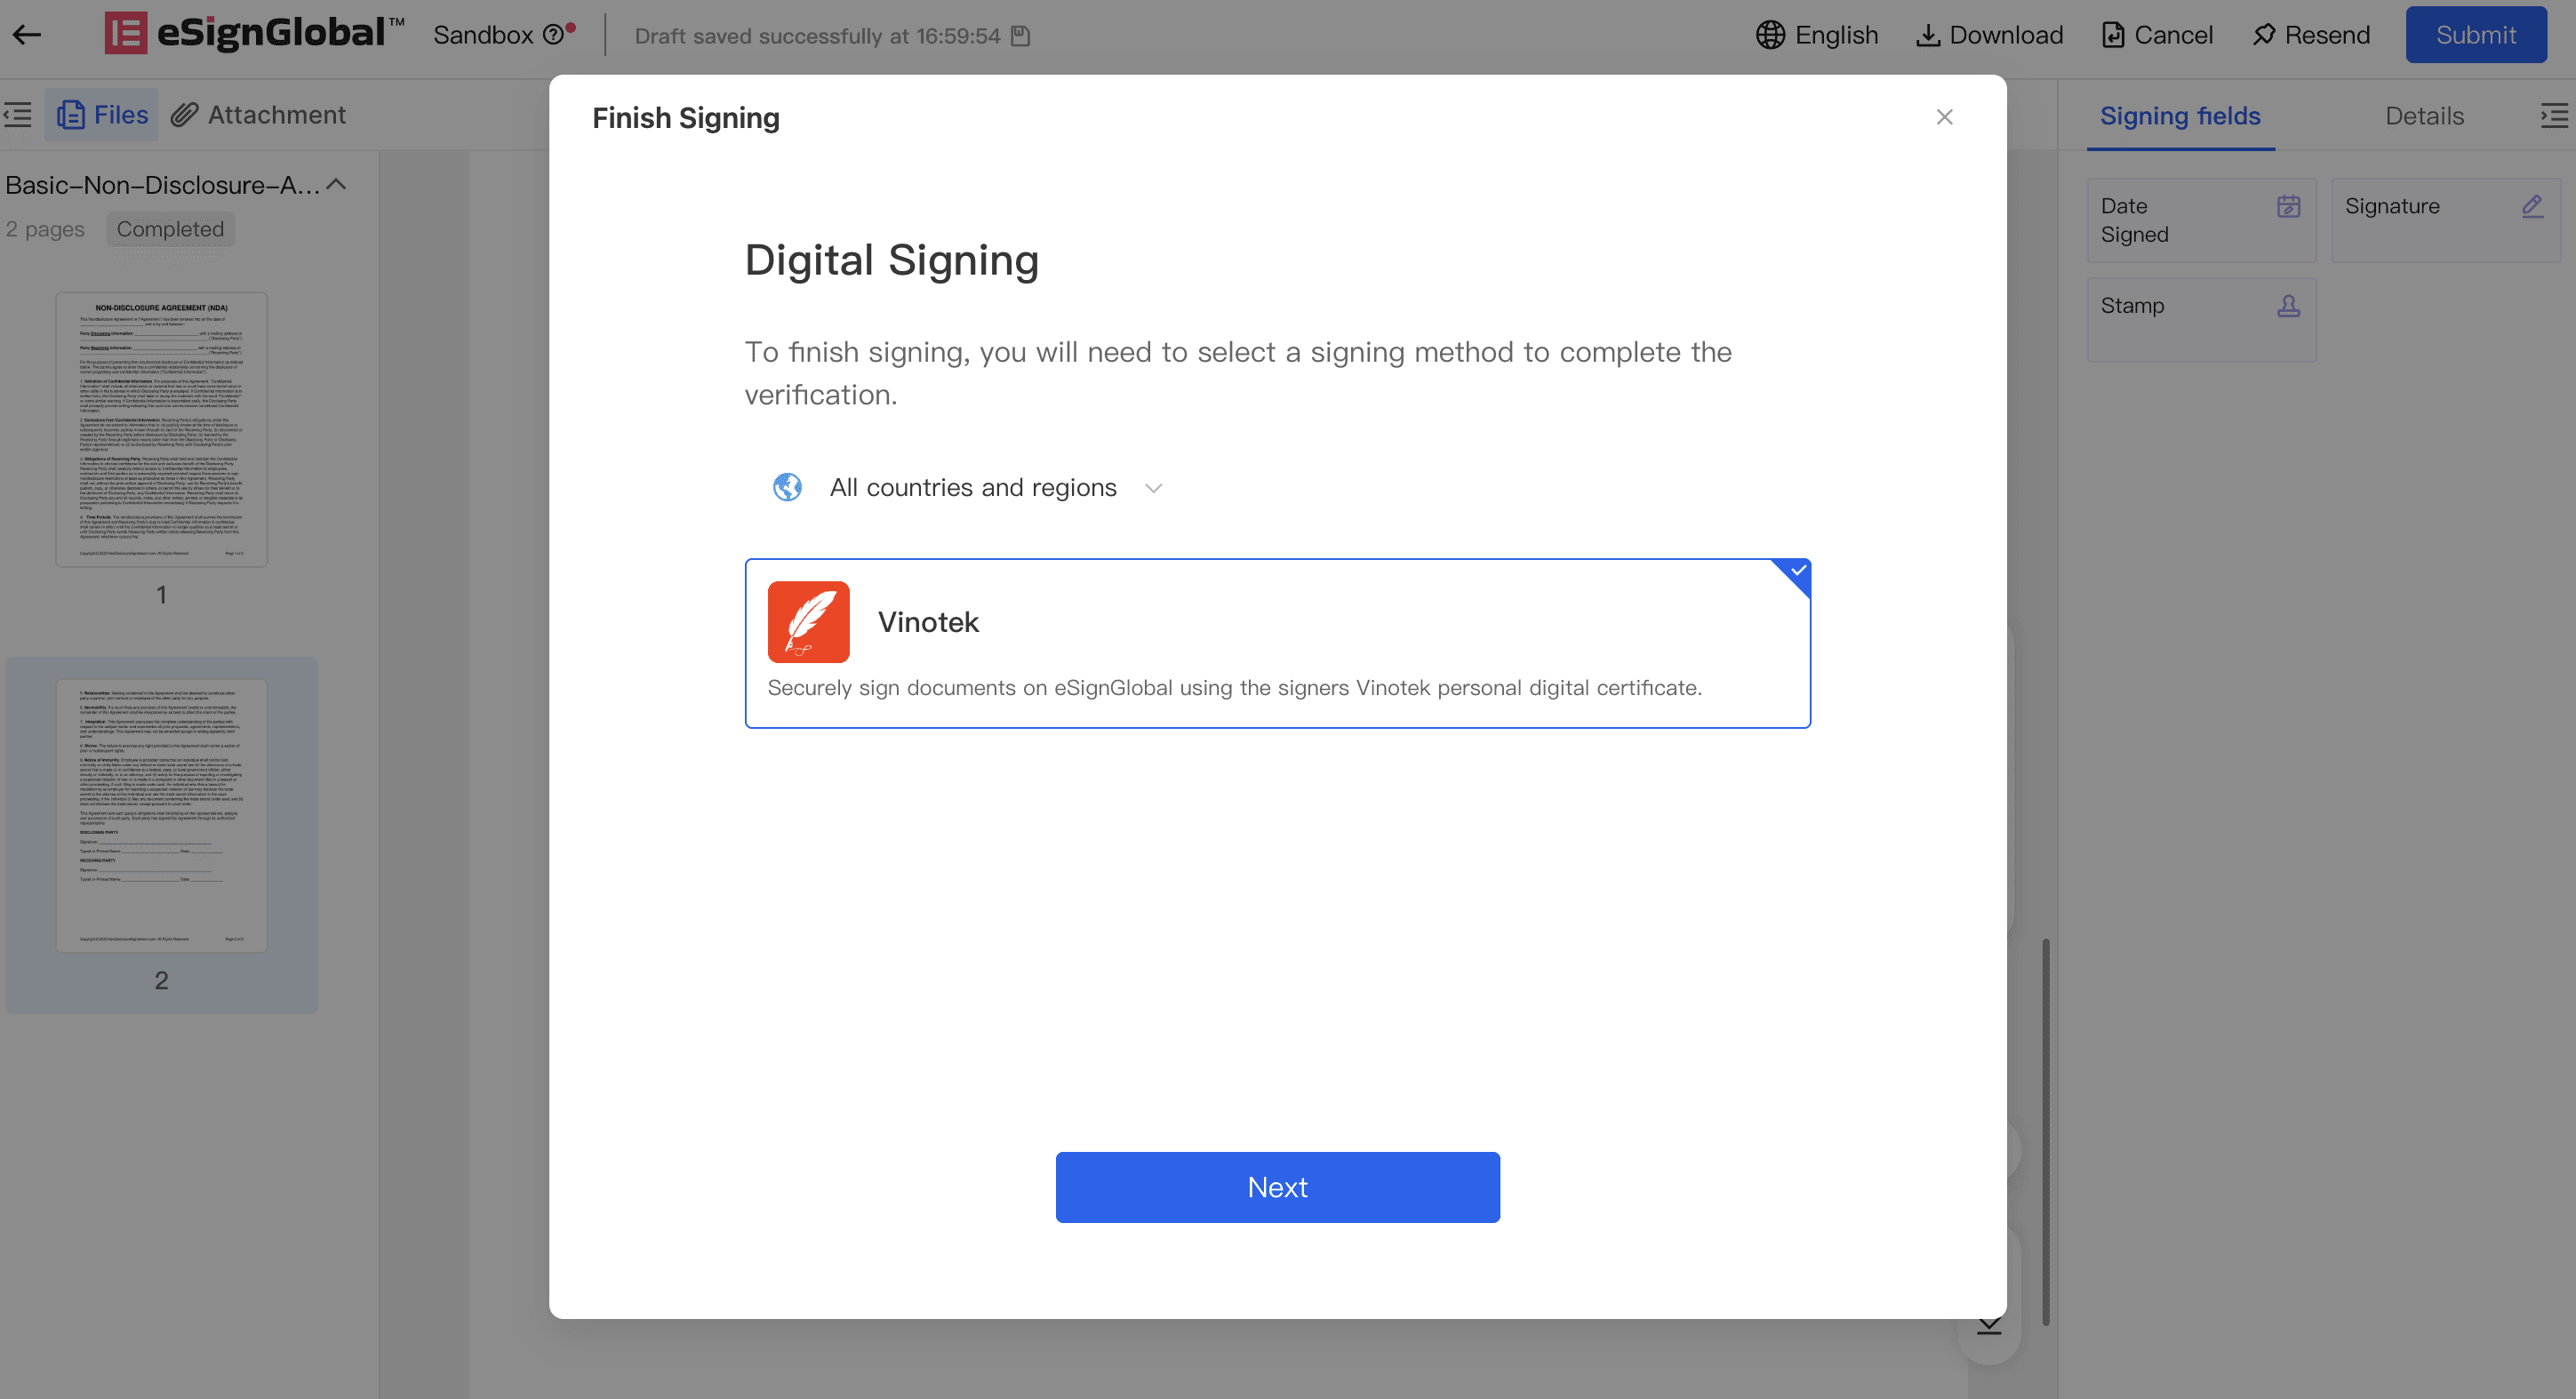
In the [Digital Signing] popup, select [Vinotek].
Note:
-
If you do not see [Vinotek], it means the Vinotek plugin is not installed in the current workspace.
-
Vinotek currently only supports Indonesian individuals; non-Indonesian individuals and corporate entities are not supported at this time.
-
-
Click [Next].
Existing Vinotek Account
-
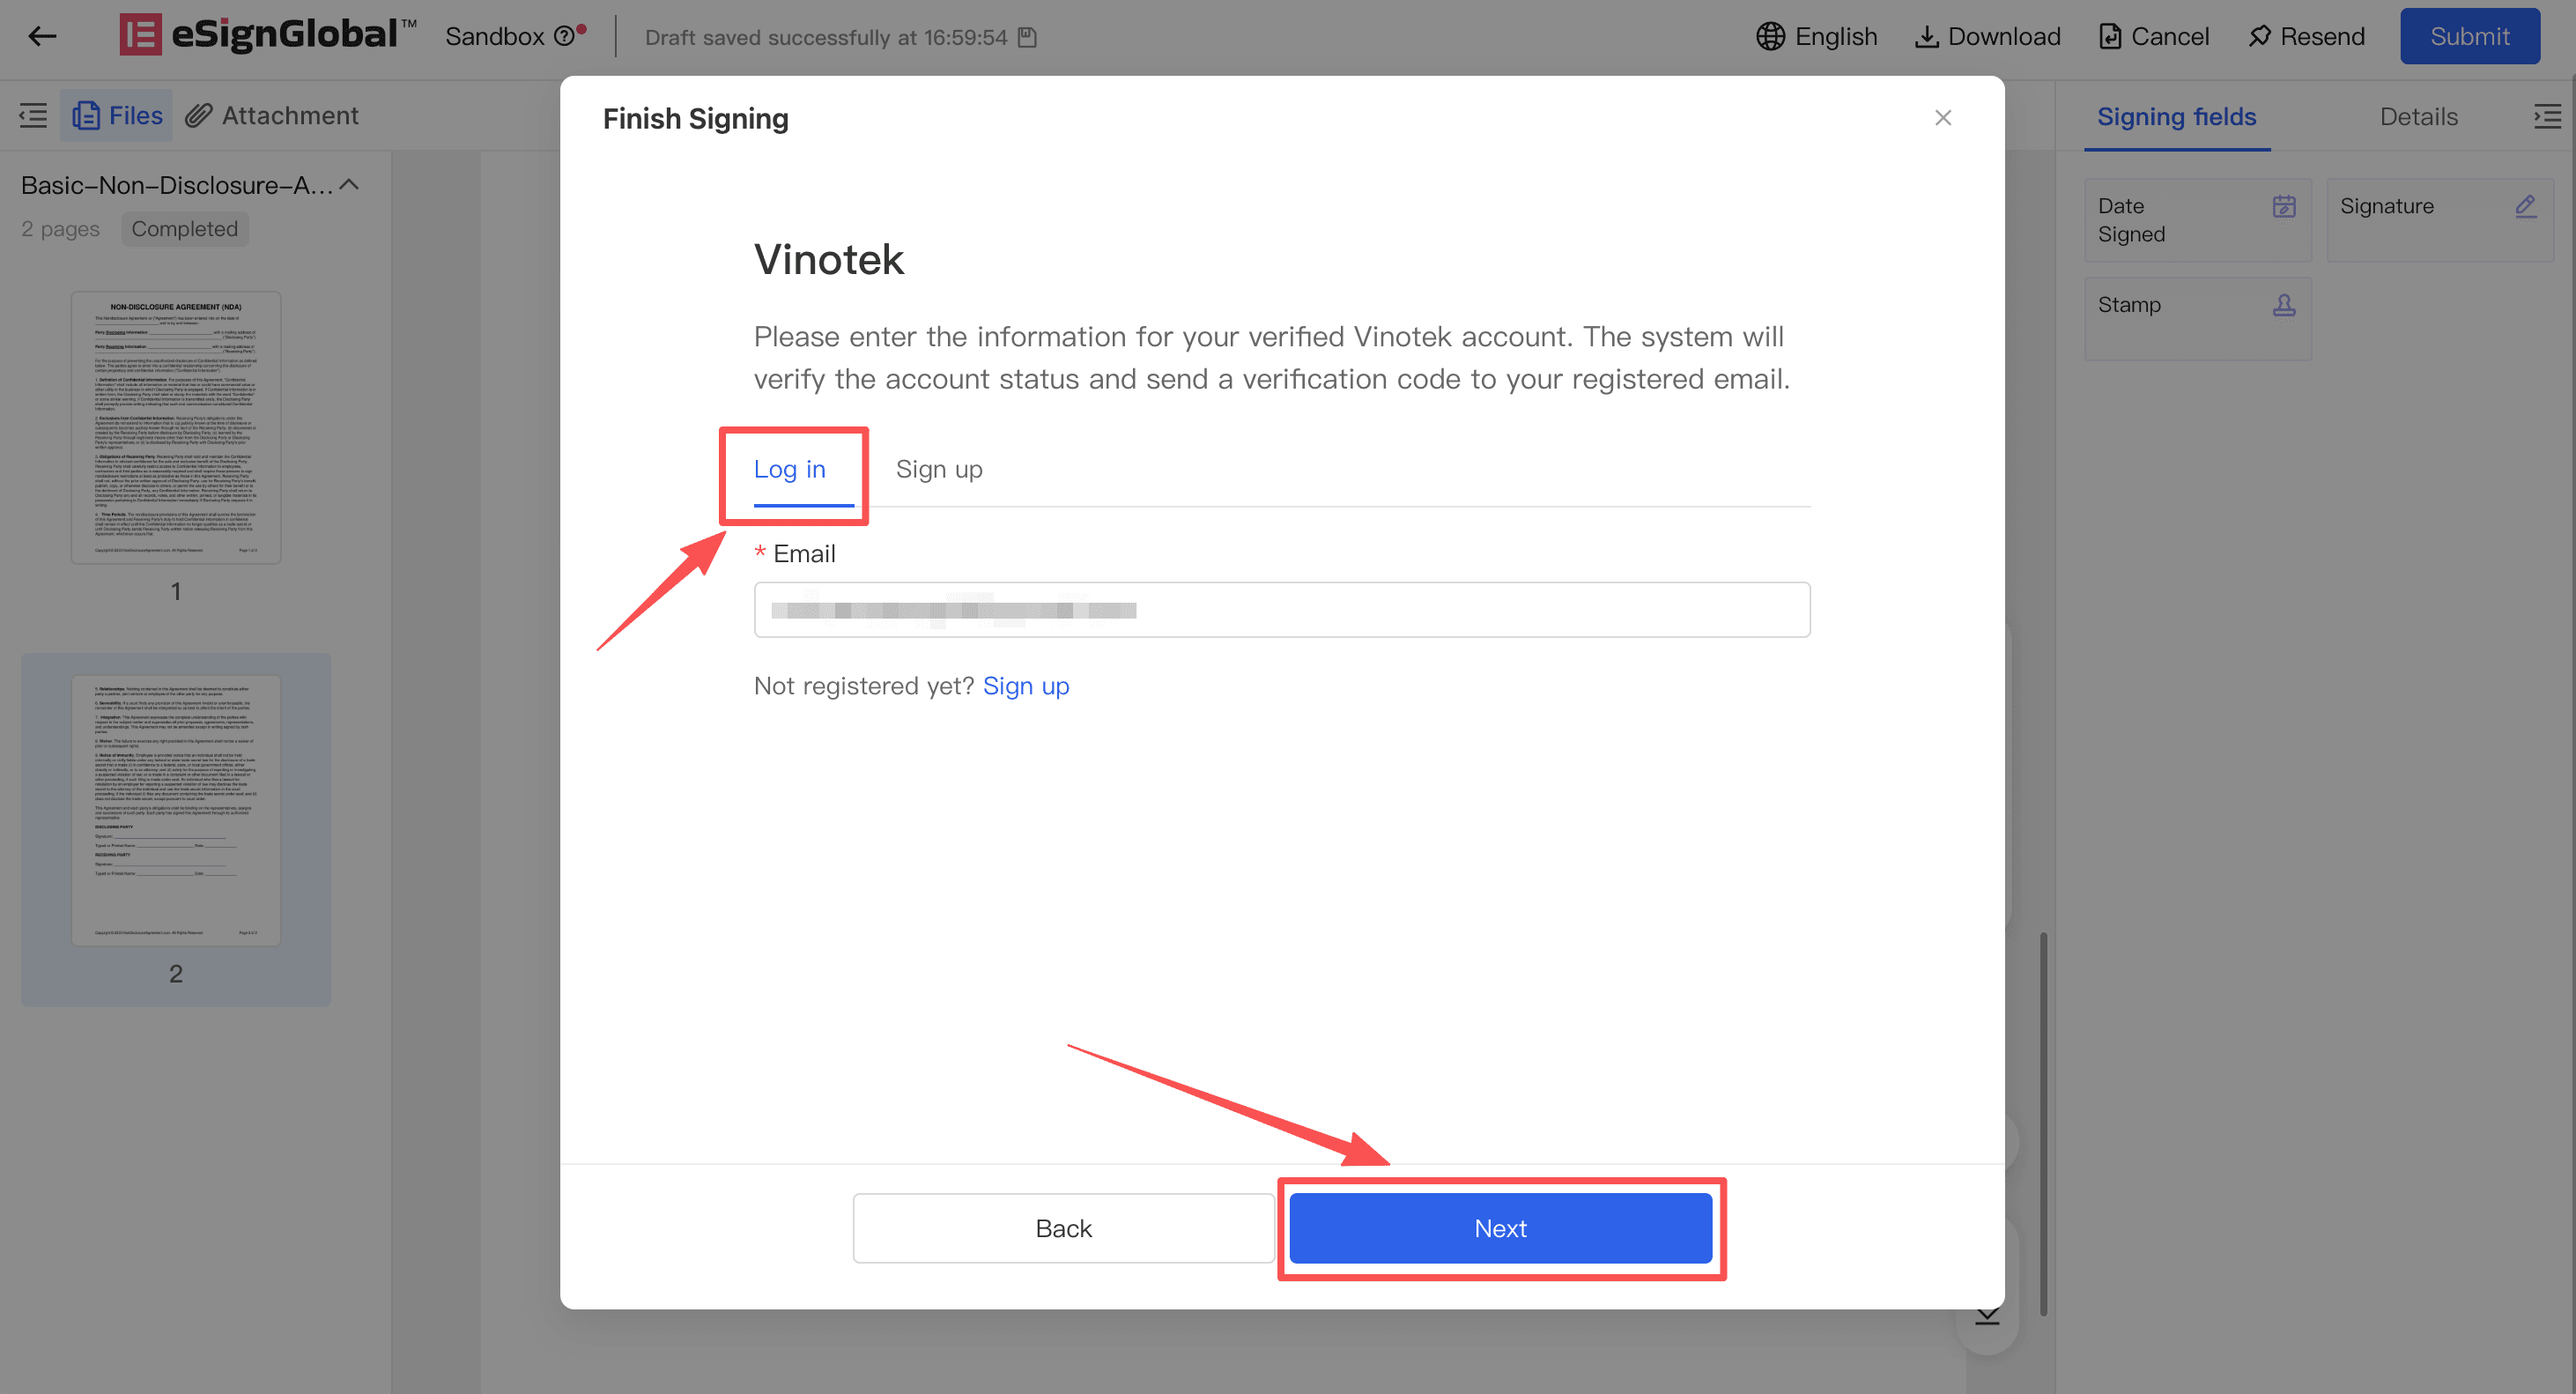
On the Vinotek account page, select the option to use an existing account.
-
Enter your Vinotek registered email address.
-
Click [Next].
-
The system will send a verification code to that email address. If the system cannot find a Vinotek account associated with that email, the page will prompt you to confirm the email address or complete registration first.
Registering a Vinotek Account
-
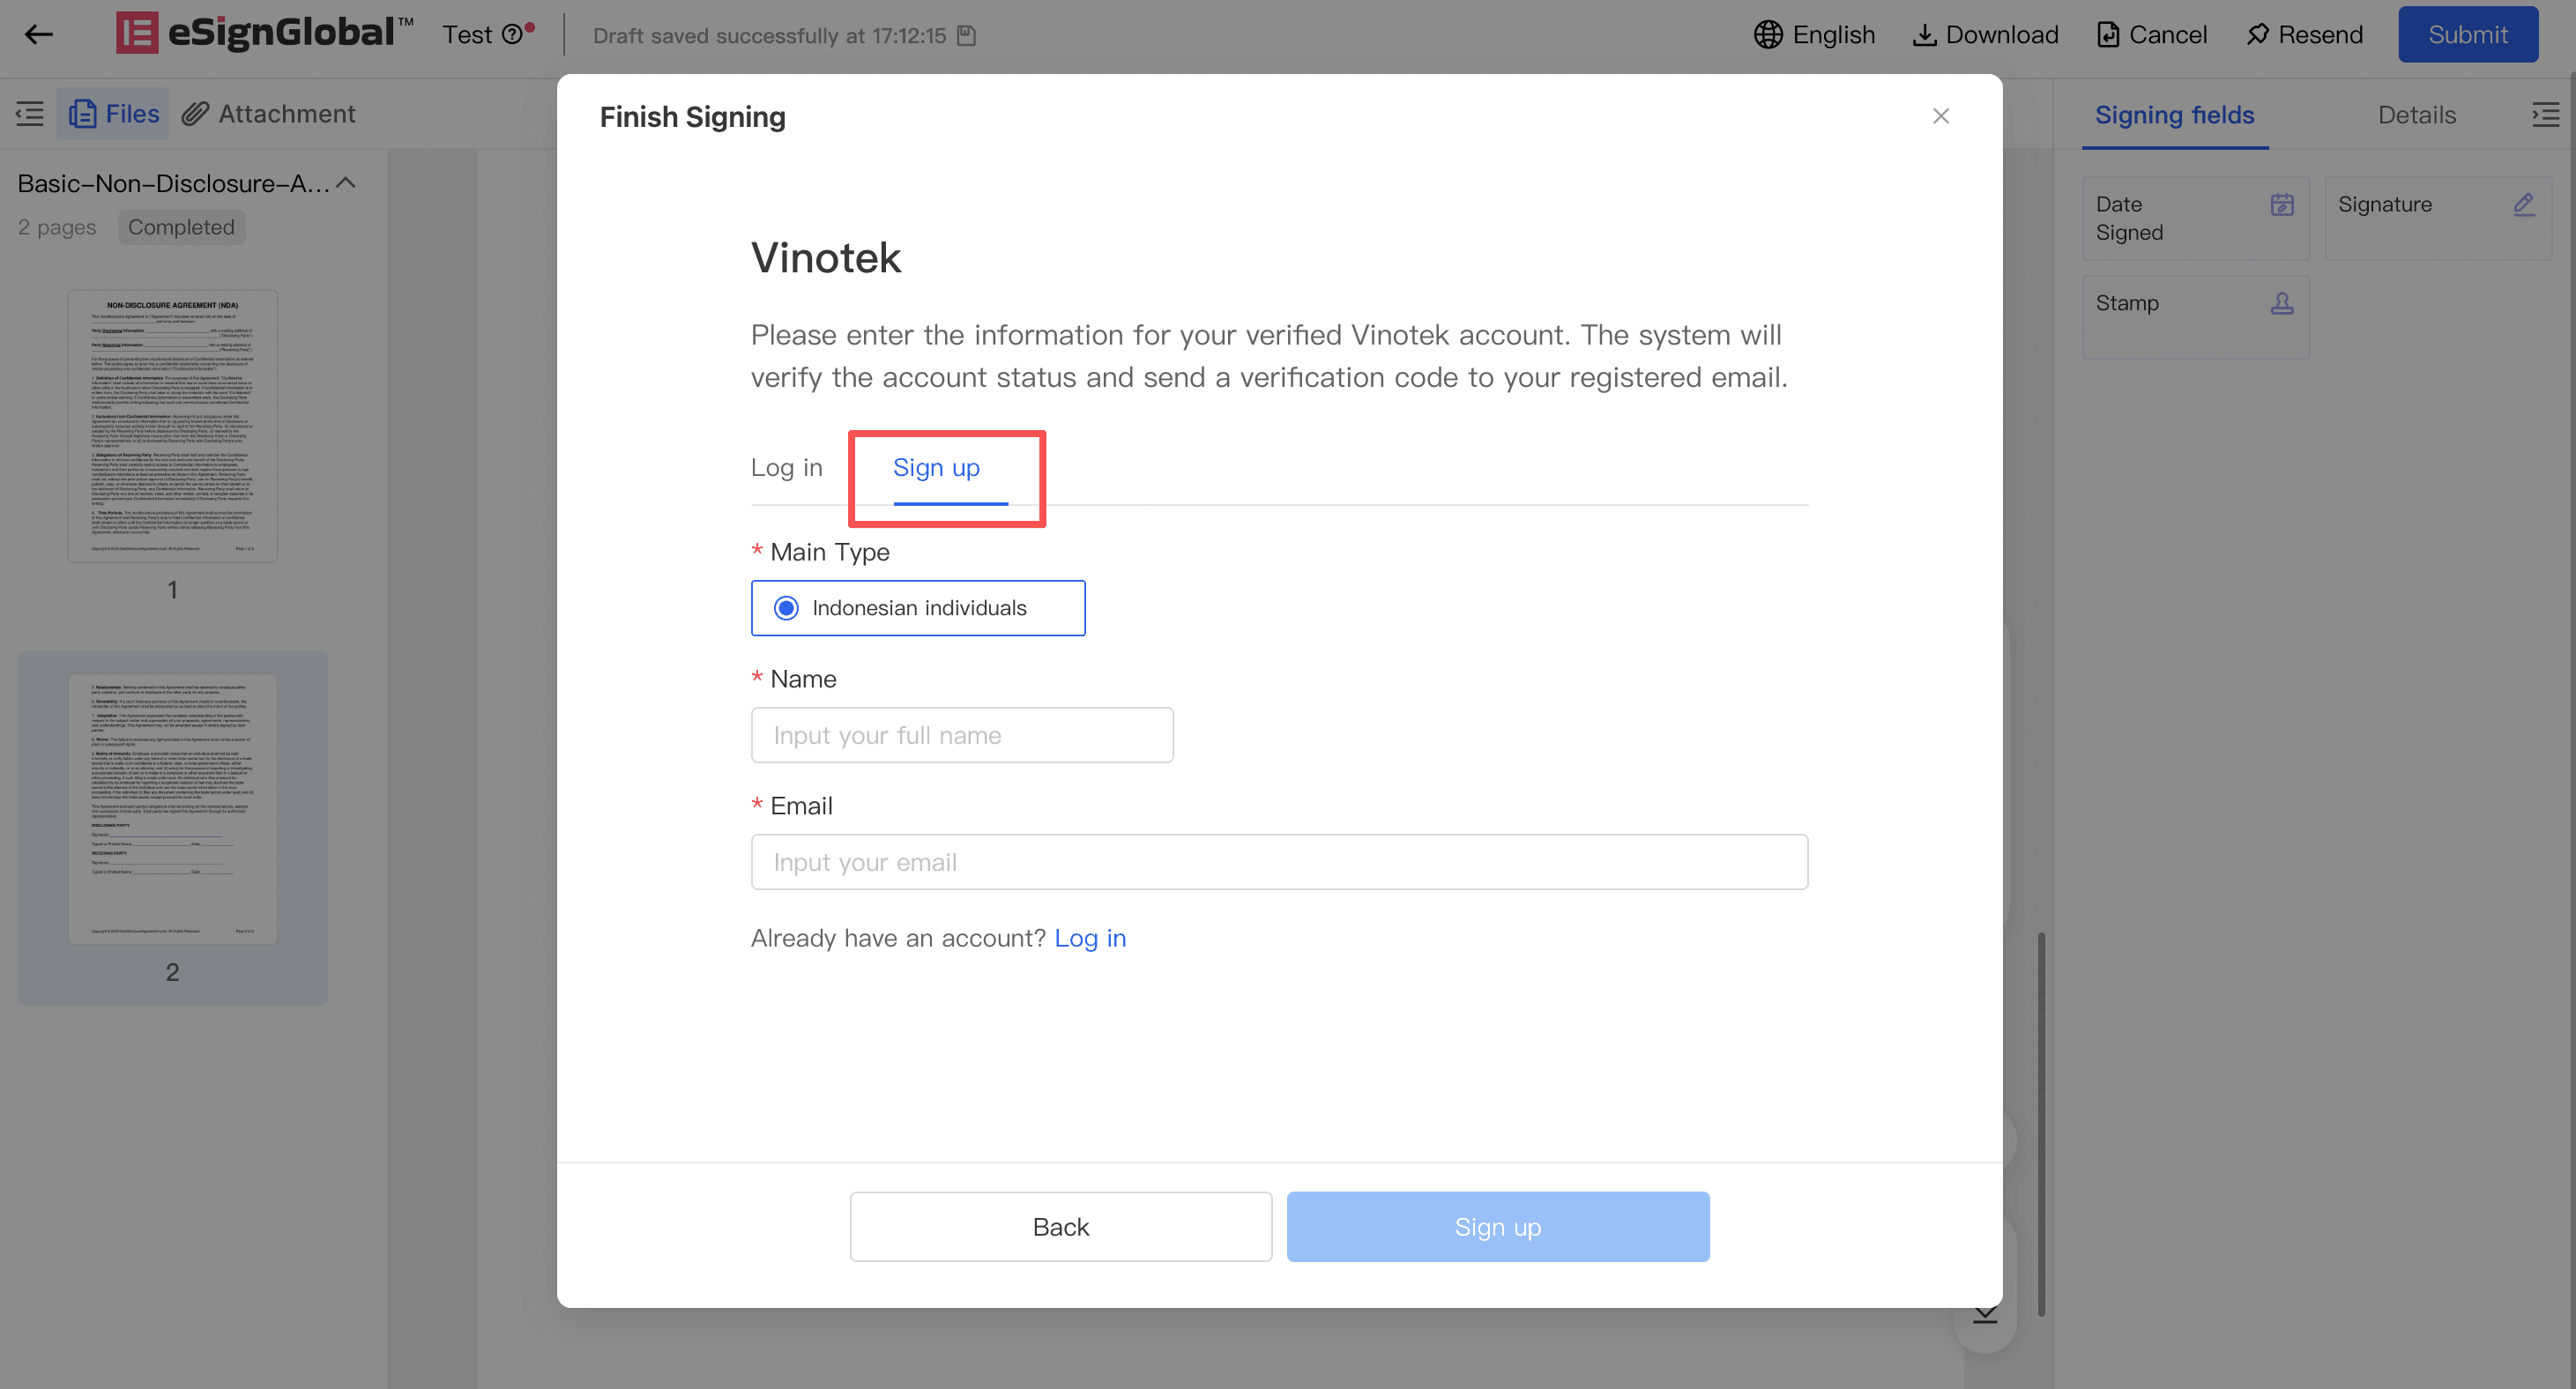
If you do not yet have a Vinotek account, click the registration link in the Vinotek popup.
-
Confirm the entity type as [Indonesian Individual].
-
Fill in your name and email address.
-
Click [Initiate Registration].
-
The system will notify you that the activation email has been sent to the email address you provided.
-
Open the Vinotek activation email in your inbox and follow the instructions to complete real-name activation.
Note:
-
Real-name activation is completed on the Vinotek page; eSign.AI does not collect your real-name information.
-
After completing activation, please return to the signing page and continue signing using the email address registered with Vinotek.
-
If the page indicates that the email address is already registered, please go back to the existing account process and enter that registered email address directly to sign.
-
Enter Verification Code and Complete Signing
-
After entering the verification code page, check the email where you received the verification code.
-
Enter the verification code received in the email. If you do not receive the email for a long time, please check your spam folder or click [Resend].
-
Fill in the reason for signing.
-
Click [Complete Signing].
-
After successful verification, the system will complete the signing and display the signing success page.
Account Exception Handling
-
If the page prompts that the account has not been activated, please go to the Vinotek activation email to complete real-name activation, then return to the signing page to continue.
-
If the page prompts that the registration review was not passed, you can click [Re-register] to initiate the application again.
-
If the page prompts that the certificate has expired, been revoked, or is invalid, you can click [Reactivate].
-
After re-registering or reactivating, please go to your email to check the Vinotek email and follow the instructions in the email to complete the process.
-
After completion, return to the signing page and re-enter the Vinotek registration email to continue signing.


