'%3e%3cpath%20fill-rule='evenodd'%20clip-rule='evenodd'%20d='M6.99935%2012.8327C10.221%2012.8327%2012.8327%2010.221%2012.8327%206.99935C12.8327%203.77769%2010.221%201.16602%206.99935%201.16602C3.77769%201.16602%201.16602%203.77769%201.16602%206.99935C1.16602%2010.221%203.77769%2012.8327%206.99935%2012.8327Z'%20stroke='%23666666'%20stroke-linecap='round'%20stroke-linejoin='round'/%3e%3cpath%20d='M1.16602%207H12.8327'%20stroke='%23666666'%20stroke-linecap='round'%20stroke-linejoin='round'/%3e%3cpath%20fill-rule='evenodd'%20clip-rule='evenodd'%20d='M6.99935%2012.8327C8.28802%2012.8327%209.33268%2010.221%209.33268%206.99935C9.33268%203.77769%208.28802%201.16602%206.99935%201.16602C5.71068%201.16602%204.66602%203.77769%204.66602%206.99935C4.66602%2010.221%205.71068%2012.8327%206.99935%2012.8327Z'%20stroke='%23666666'%20stroke-linecap='round'%20stroke-linejoin='round'/%3e%3cpath%20d='M2.875%202.95898C3.93063%204.01461%205.38896%204.66754%206.99978%204.66754C8.61062%204.66754%2010.069%204.01461%2011.1246%202.95898'%20stroke='%23666666'%20stroke-linecap='round'%20stroke-linejoin='round'/%3e%3cpath%20d='M11.1246%2011.0425C10.069%209.98691%208.61062%209.33398%206.99978%209.33398C5.38896%209.33398%203.93063%209.98691%202.875%2011.0425'%20stroke='%23666666'%20stroke-linecap='round'%20stroke-linejoin='round'/%3e%3c/g%3e%3cdefs%3e%3cclipPath%20id='clip0_1267_9109'%3e%3crect%20width='14'%20height='14'%20fill='white'/%3e%3c/clipPath%3e%3c/defs%3e%3c/svg%3e)


 Service Center
Shared Access
Shared access allows workspace members to handle envelopes on behalf of other members within the same workspace, within the authorized scope. Authorized members log in with their own accounts without needing to share others’ account credentials. The system records both the actual operator and the represented member for easy traceability later.
Please Note Before Use
- Only super administrators and administrators can configure shared access.
- Shared access only applies to envelopes, envelope categories, and envelope initiation workflows; it does not support signing on behalf of others.
- Authorized members can only operate within the authorized scope and remain subject to the original envelope permissions of the represented member.
- Shared access will automatically expire if the authorization period ends, is revoked, or if any member is disabled/resigned.
- To adjust the authorization scope or validity period, please cancel the original authorization first, then re-add it.
Add Shared Access
-
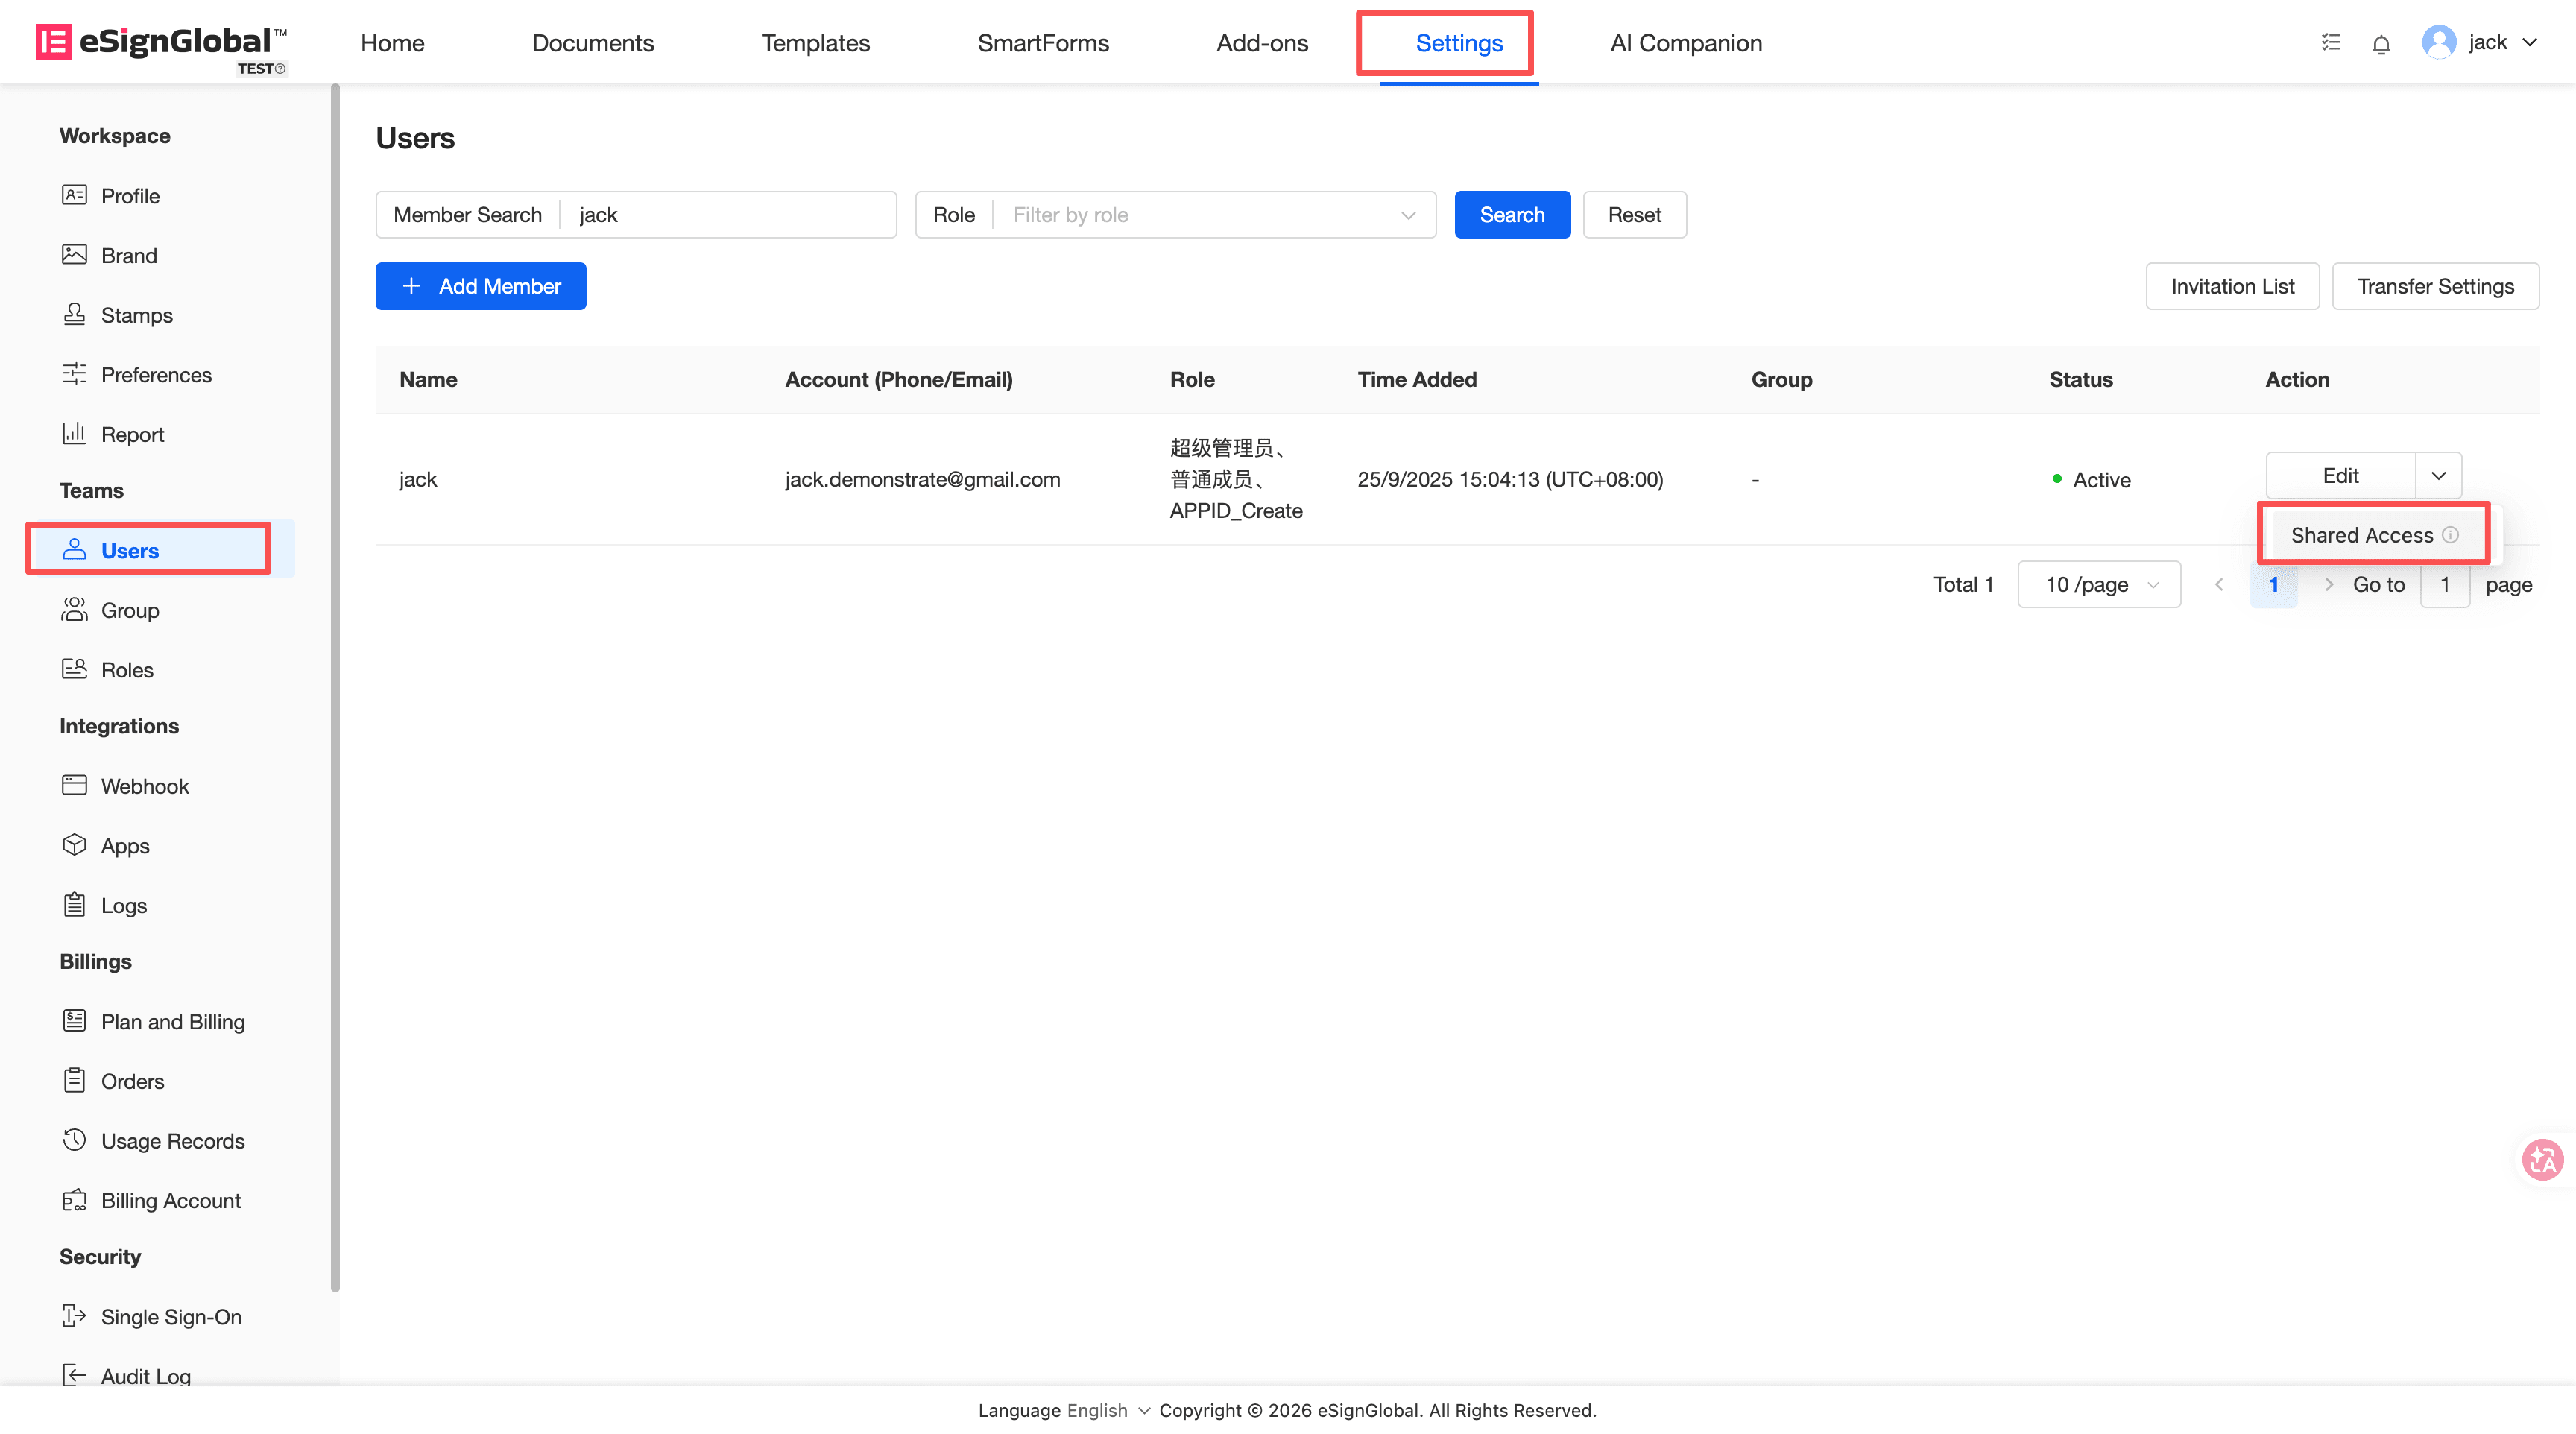
Go to the workspace, select [Settings] > [Members].
-
In the member list, select the member whose envelopes need to be handled on their behalf, and click [Shared Access] in the action column.
-
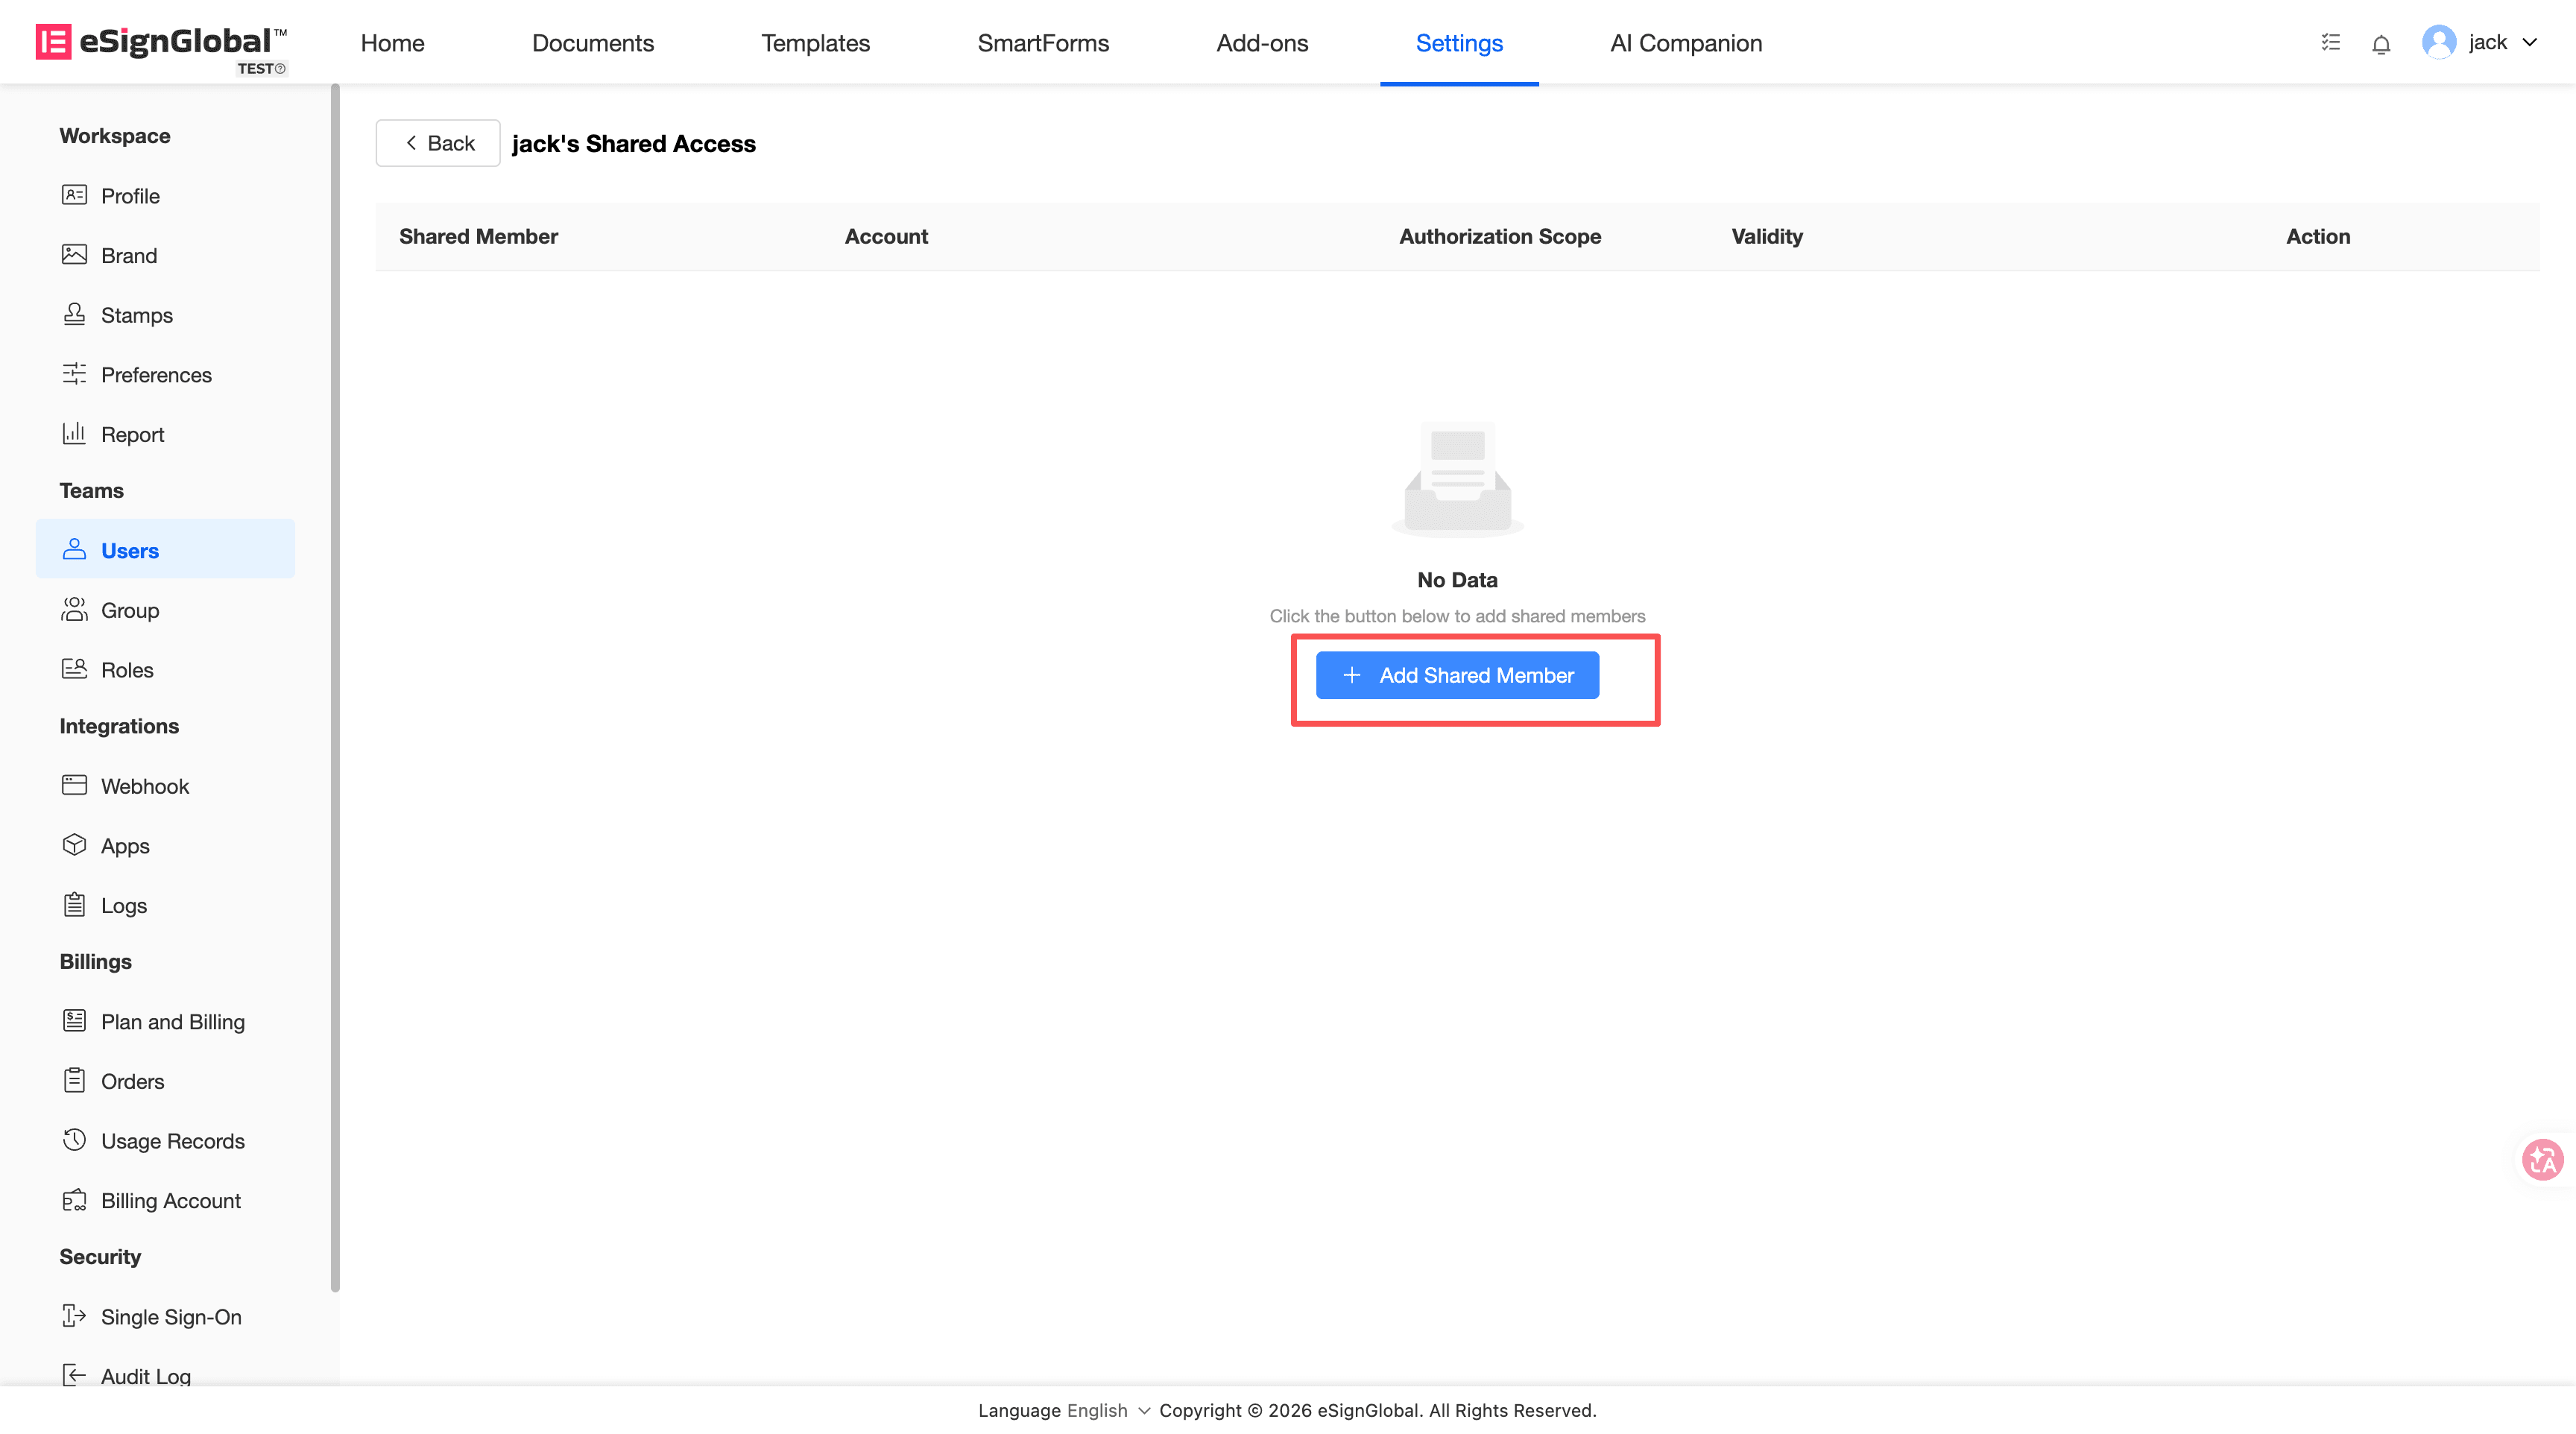
On the Shared Access page, click [Add Shared Member].
-
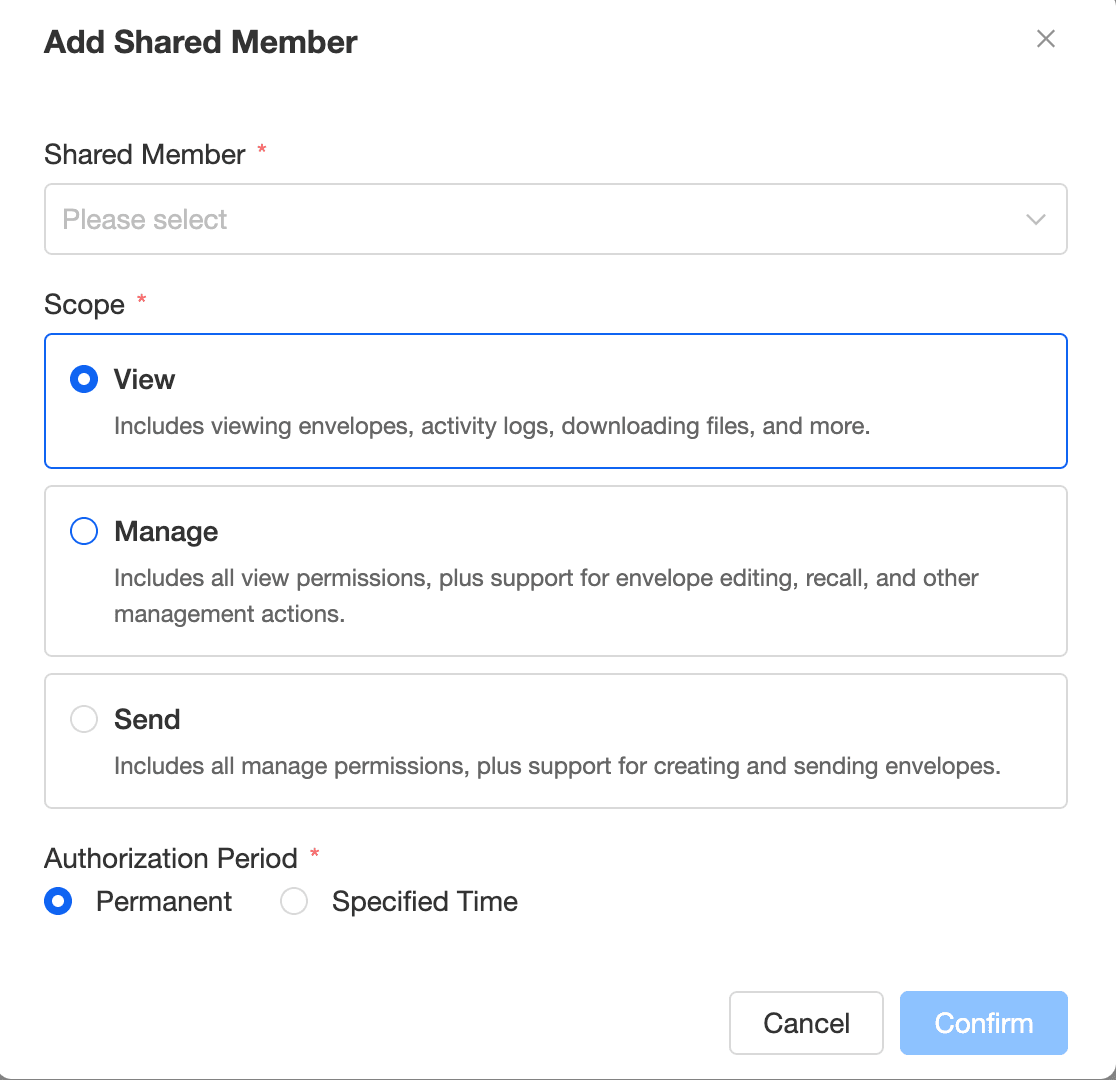
Select one or more shared members. Shared members must be active members within the current workspace; you cannot select the represented member themselves.
-
Set the permission scope.
- View: View envelopes, envelope categories, and envelopes under categories that the represented member has permission to view.
- Manage: Includes viewing, and allows managing envelopes and envelopes under categories that the represented member has permission to manage; does not include envelope category management.
- Send on Behalf: Includes managing, and allows initiating envelopes on behalf of the represented member; when initiating, you can use document templates that the represented member has permission to use.
-
Set the validity period.
You can choose to make it permanently valid, or set a specific expiration date. After expiration, the authorization will automatically become invalid.
-
Click [Save].
Upon successful saving, the page will display currently valid shared access records.
Cancel Shared Access
-
Go to [Settings] > [Members].
-
Find the represented member and click [Shared Access].
-
In the authorization list, find the shared member whose authorization needs to be canceled.
-
Click [Cancel] or [Revoke].
-
After confirmation, this member will no longer be able to handle envelopes on behalf of the represented member.